Nesting for Efficient Use of Materials
Efficient nesting of your modules is very important. Not only is it good design, it is the only way that we can allow large or complex lamps to be produced within the classroom budget. In the image above, notice that the lamp design is made from an icosadodecahedron, so there are 32 modules (12 pentagonal and 20 triangular). One of the pentagonal modules has a circle drawn to fit the lamp socket. The modules are laid out compactly so little material is wasted.
Nesting is the process of placing parts that need to be cut out as close together as possible, while still maintaining the ability to safely cut them out. As a practical matter, the nested parts should have a little bit of clearance between one another to accommodate for error and possible kerf. Kerf is the material removed by a cutting device such as a laser, router, or saw blade. For example, a table saw may have a 1/8" thick blade installed; therefore, its kerf is 1/8". In the Lamp Project, hand-cut parts are cut with either a knife or scissors. Analogous is a slit cut versus a slot cut; a slit merely parts, whereas a slot removes.
Planning for Nesting
.")
Minimizing the gap between modules is a good idea unless you are sloppy in your cutting. In a production environment, cutting tolerances certainly can be tight. However, in the world of mass production other considerations must be taken into account, such as ease of removing the waste material from the production machine. If there is enough gap between the cut pieces then the waste material can be removed as a single piece rather than many small disconnected waste pieces. Second, if the waste piece is held together as one unit, the risk of small loose waste parts moving about and spoiling the necessary parts is lessened.
Nesting Large Extensions

Above is a nesting plan for a set of identical modules that have large extensions. The pentagonal star shape allows for a fairly snug fit between the parts. The base polygon is a dodecahedron. All 12 modules fit on a sheet of material that is 36" x 48". There is waste, but not an enormous amount.
Super Efficient Nesting
A way to make a super efficient nesting is to design modules that fits into a tessellation or lattice. For more on this, see, About Symmetry. Look up the section on translational symmetry. A tessellation, or tiling pattern, utilizes the entire material with no gaps at all between nested parts. This is the ultimate in material efficiency. A Lattice is similar but allows for openings to exist where parts meet.
As long as there is no kerf required for the cutting tool, there would be no waste in a pure tessellation (except for maybe along the edges of the material). A laser cutter kerf is about a quarter of a millimeter, which is so small it is often negligible. In the Lamp Project, cutting with a laser may not need accommodation for kerf becuase the material are flexible, and visually complex . Cutting with a machine that removes a significant kerf would not allow for true tessellation of the modules.
Here are steps to be taken before you will be given materials. After discussion and approval of your final design:
Create an accurate template of your module or modules, including all extensions and interlocks. Efficiently nest the appropriate number of pieces on raw Synskin from the roll Acquire a lamp cord-socket set and LED bulb On the face of one module, or in the corner of a set of modules, make an appropriate accommodation for mounting the bulb, socket, or cord set, as discussed in lecture. Cut out and assemble your modules and electrical parts into the finished lamp. Hang for critique.
Complexity, Material, and Time.

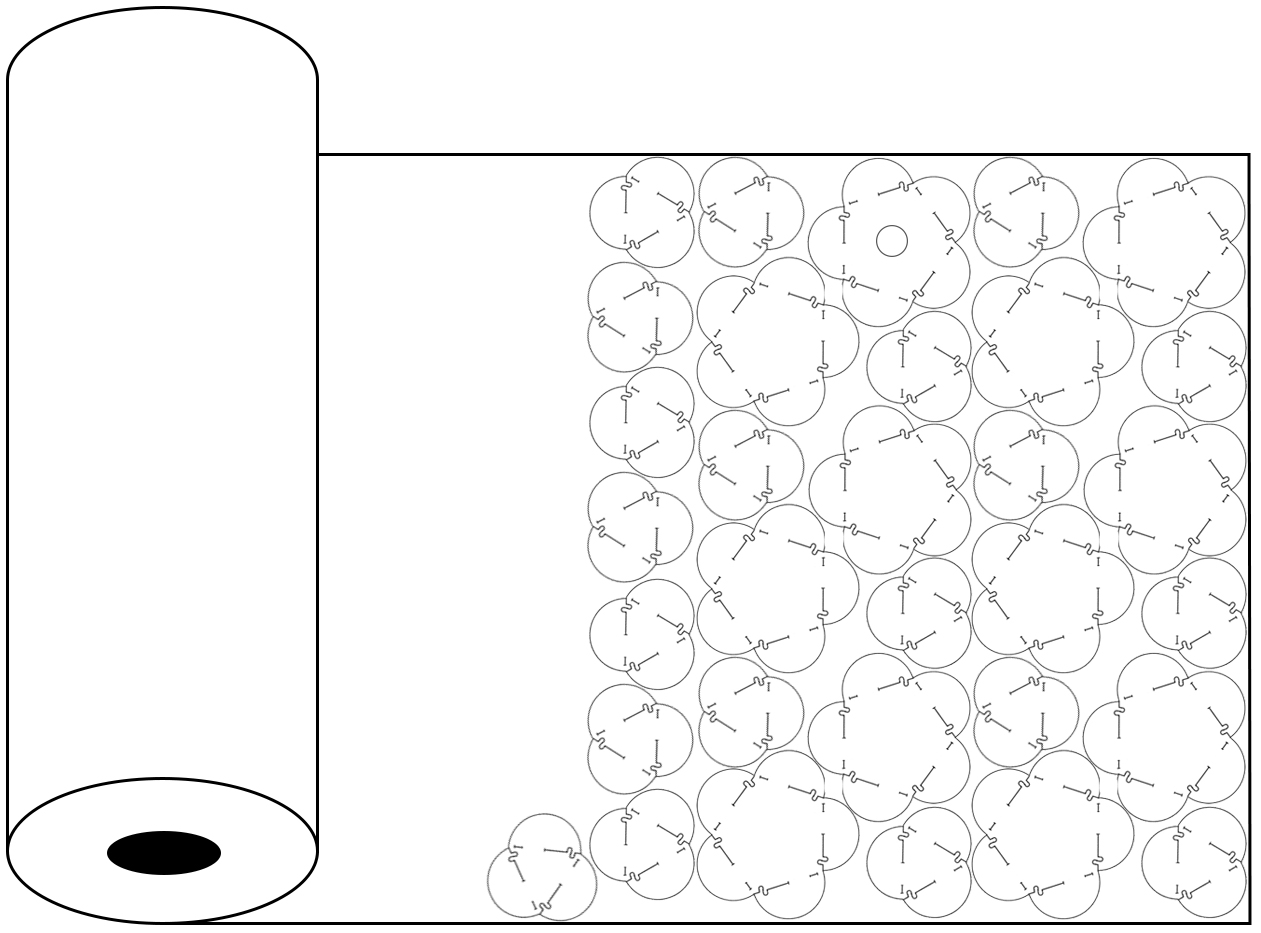
Above is the nesting pattern of a student named Tanya Alexander who took the class in fall 2020. See how, despite the irregularity of her pattern pieces, she devised a plan to nest everything together as closely and efficiently as possible. It even left a section of extra material that she could do experiments with, or use in case she made a mistake in cutting out the lamp.
Tanya's is an example of an intensely complex design that needed a lot of parts. All of these parts were cut out by hand, so the student had to be careful not to make too many mistakes. In the lower right corner of the sheet is an area that she set aside for any errors. Nesting could have been tighter, but she did a good job. This was during Covid, and the class was taught online, so there was not much chance to get more material if anything went terribly wrong. I had to either prepare raw material for students to pick up, or mail it to those outside of the area.
This video shows Tanya Alexander's finished lamp. It was completed during the Covid shutdown, so all work was done at home, and this video was the project submission, which is only 43 seconds long.
Vector Drawing

Making work by hand is a primary objective in this 3D-Design class. Sometimes, though, working in a vector drawing program is also appropriate. In fact, to use a laser cutter, vectors will need to be prepared anyway. If you have skills in using vector programs such as Adobe Illustrator, Affinity Designer, or any similar program, ask how to employ it in this project. If you plan on using a laser cutter, but have created hand-made prototypes, or have no knowlege of vector software, ask for a tutorial in the use of Adobe Illustrator on the classroom computer.